
Let’s say you create 3 sprites (of ball shapes – learn how to change the sprite’s costume): one of color Red, other of Blue and last one of Green. Now you want all three to jump when different keys are pressed. For example, Red one should jump when key ‘a’ is pressed and Blue one should jump when key ‘b’ is pressed and Green one should jump when key ‘c’ is pressed. How will you simulate this?
For this, you need to create three sprites of different colors. Use the turtle button between Stage and Sprite Corral to add as many sprites as you want. And then click on the desired sprite in Sprite Corral to change its costume.
![]() Please pardon the shapes of balls as I couldn’t draw perfectly circular sprites.
Please pardon the shapes of balls as I couldn’t draw perfectly circular sprites.
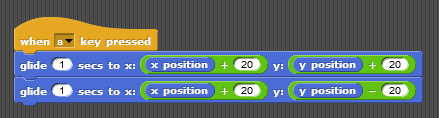
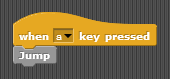
Now Option 1 to solve the above problem of making them jump on different key clicks is to write tasks in each sprite’s script area to make it jump when the condition is met. For example, the scripting area of Red sprite will look like:
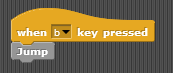
 And Blue like:
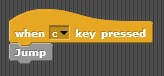
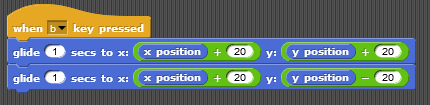 And Green like:
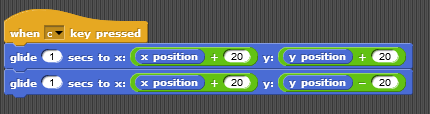
Now if you press keys ‘a’, ‘b’, or ‘c’, the corresponding sprite will move accordingly.
The challenge with this problem is that as you need to add more sprite’s into the solution, you will need to copy the same code that many numbers of times, and it is sustainable only to a certain point.
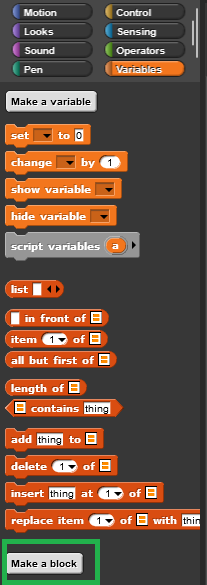
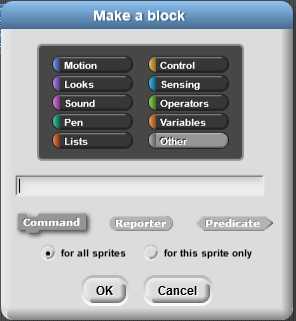
Option 2 is to create what we call a function in a programming language. A function is a block of code that you can write (or define) once and call/use it as many numbers of times as you want using just one line/command. In SNAP!, we create functions as Blocks. To create a block, go to Variables palette. At the bottom of the palette, there is a button for ‘Make a block’.
 When you click on it, it opens up a dialog box like this:
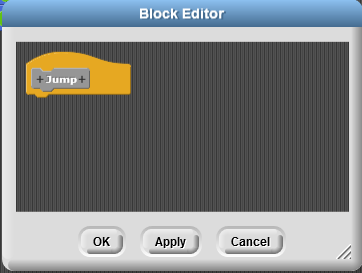
 Add a name you want to give to the block, for example ‘Jump’ and click OK. It will show up Block Editor window which looks like this:
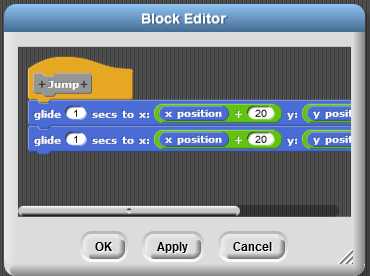
 Add the two glide tasks below the Yellow control block shown in the above image.
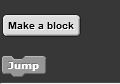
 Once done, click OK. Once done, you should see a new block created in the Variable palette by the name Jump.
 With this, we are done with defining the function/block to simulate a jump. Now let’s see who we use/call it in the program.
Now, instead of the 2 glide blocks, replace all the sprite’s blocks to look like:
 There are a lot of advantages of using Option 2. One advantage as we already mentioned is that that we need to define the block just once and use it as many numbers of times as we want.
Another major advantage of using blocks/functions is that if we need to make any modification in our code, for example, we want to change the jump height from 20 to 40, we just need to change it at one place instead of multiple locations – thus reducing the chances of error.